I love mesquite wood. It is beautiful, tough, weather resistant, hard and the worlds most stable wood. It does have a curious weakness, a screw will split it in half despite it being able to survive years as a mallet. The wood can split.
So there are methods you learn, that you would not have to learn on a wood that did not split easily. This project will show a lot of these methods.
Snap Blade Knives are handy. I use them to cut things that I would never, ever use a good knife for. If you are going to cut a box open or shape cardboard, score chipboard or cut sandpaper, then a snap blade knife belongs in your tool box. The problem is that even a nice one does not fit in when you are putting it beside fine hand tools. Lee Valley has just offered a new Retractable Japanese Saw in a snap blade knife format. This is a great idea, but it calls for a nicer handle than the typical snap blade knife shows.
As a disclaimer to total hand tool purity on this project, I used a bandsaw to shape these and a belt grinder to smooth them down before I started.
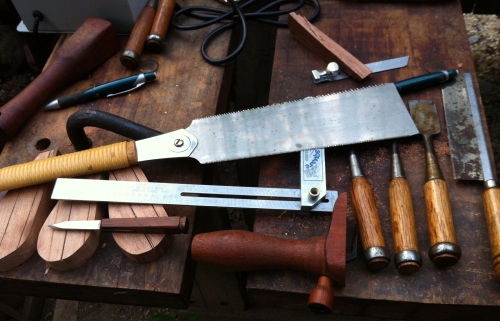
The tools used in this tutorial:
A Gyokucho 650, royoba saw. My favorite saw hands down!
a nice if old Zona Saw, 42 teeth per inch, made in Connecticut , slow cutting but fine precision!
A striking knife, made from the blade of an old pair of stainless steel scissors.
Several chisels and gouges.
A carving gauge. A marking gauge will do, but never as well.
A mallet.
A Pencil.
And a Bevel Gauge, the one I used is a Pitch Square, and the extra thick blade came in very handy.
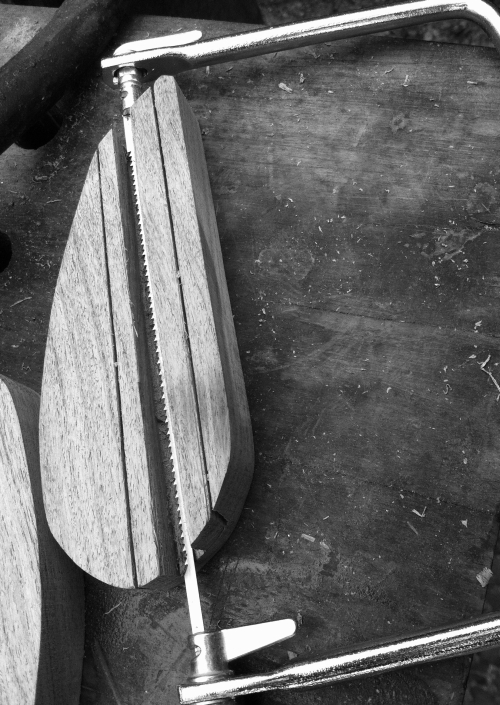
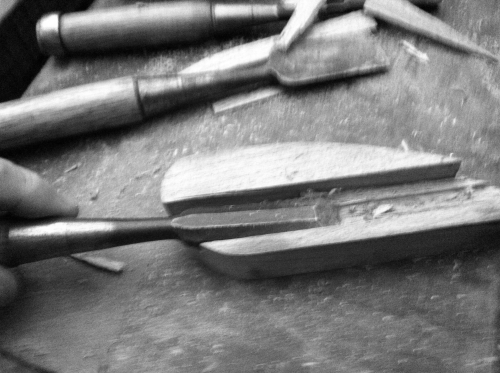
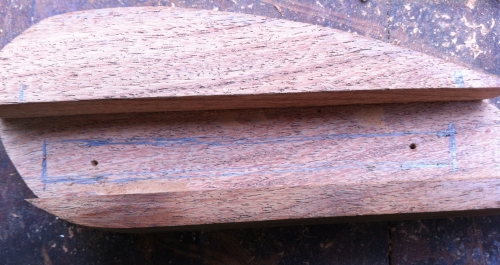
To score the two marks you see in the blank, I first used the striking knife along the edge of the bevel gauge. Then deepened the line with the ultra fine Zona saw.
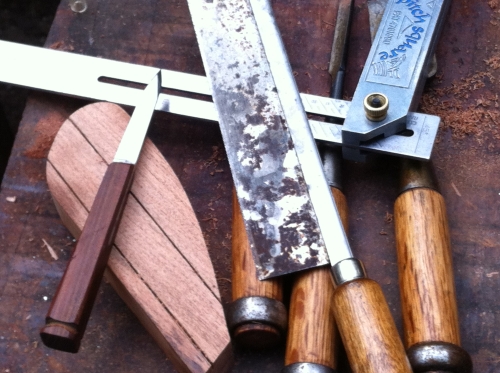
I am marking the limit for cutting with my carving gauge.
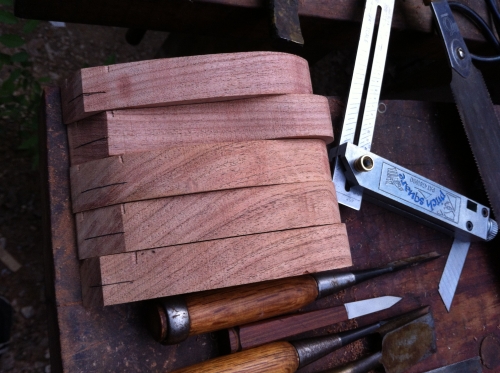
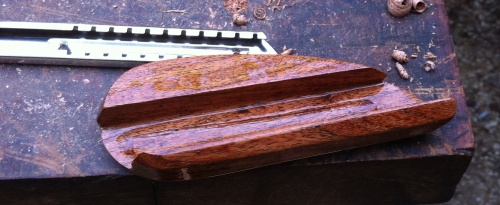
Here are all the blanks with the depth of cut mark scored deeply to prevent tear out, and then penciled in to make it easier to see.
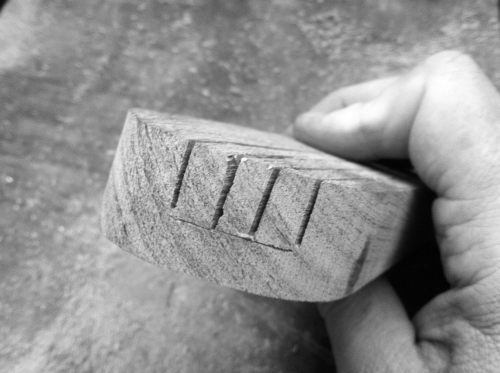
Now I use the Gyokucho 650 to do the serious sawing. I also used a 1-2-3 block just to see how square I was cutting.

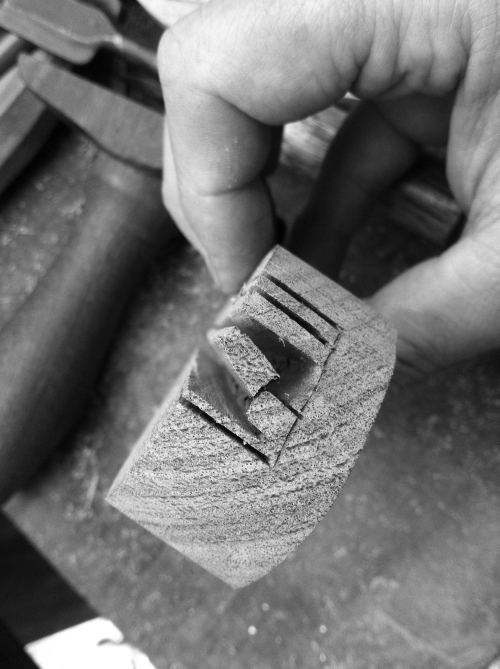
Here are the cuts, just shy or or touching the depth mark. The extra cuts are so that the waste can be extracted easily.
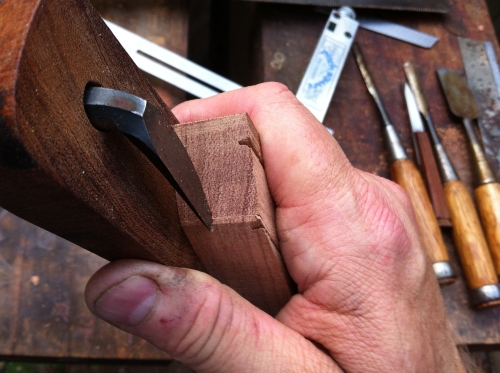
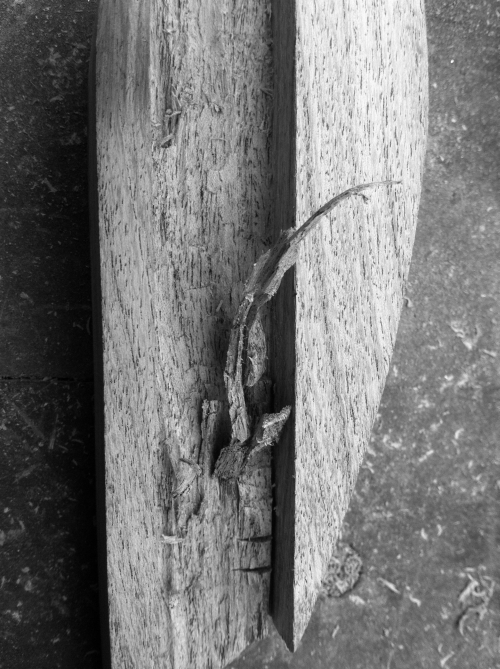
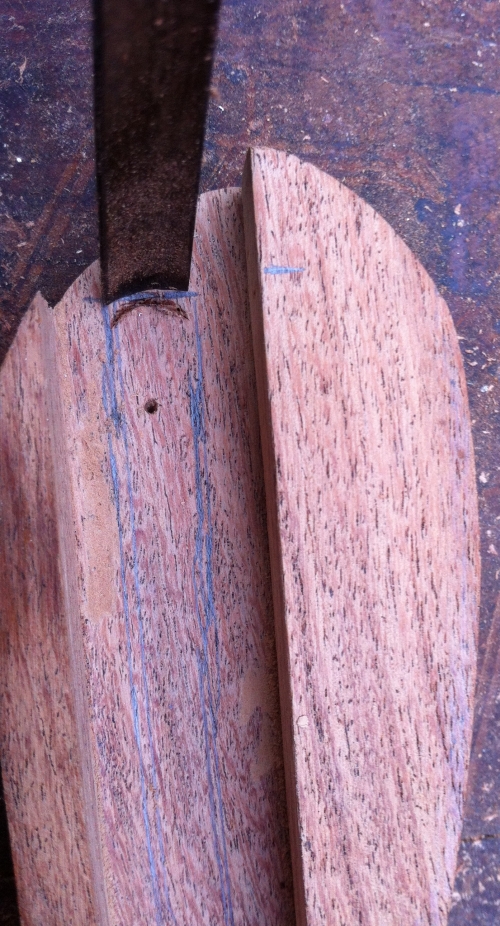
By tapping in the chisel, stress is put on the center section. I would be happy if the sections on either side were to pop out on their own, but I will not force it. One of the outside walls is as thin as the section beside it, and it would be far to easy for it to spit out.
The center pops out with a little bit of rocking it side to side. Tapping in on the ends with a fine chisel also helped.
Normally I would use a saw to safely remove the rest of the waste, but the length of this cut out precludes effective sawing. So this saw was not used.
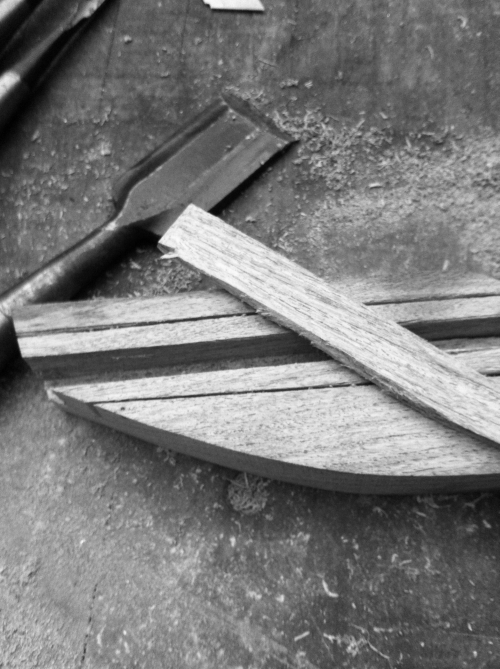
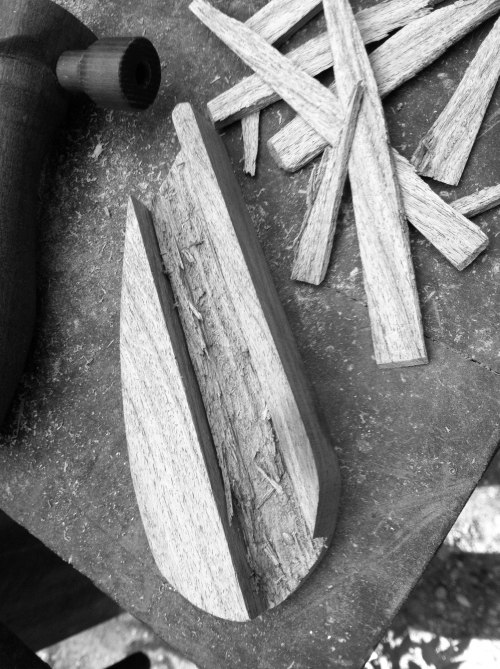
Instead I cut the remaining waste sections into thinner, weaker sections.
These were much easier to pry out.

A little bit of chisel work was called for on the ends.
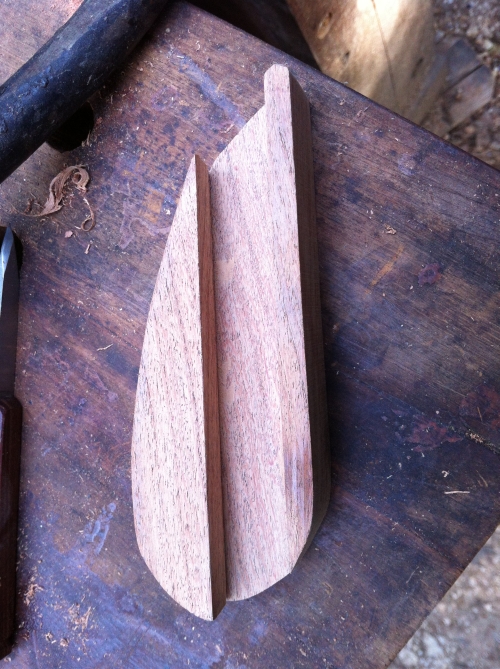
Finally we have a rough bottom to clean up.
Chips can peel up deep chunks from below. by notching high parts, you make the sections more flexible and less likely to peel up a big chunk. This is chip breaking for a chisel.

I like to chisel flat, like this, but grain and length keep me from being able to. Since I sharpen to a single bevel, I am able to flip over and still plane a fairly flat line.
Here is how the notches made allow stiff mesquite to flex and bend up without tearing out other wood.
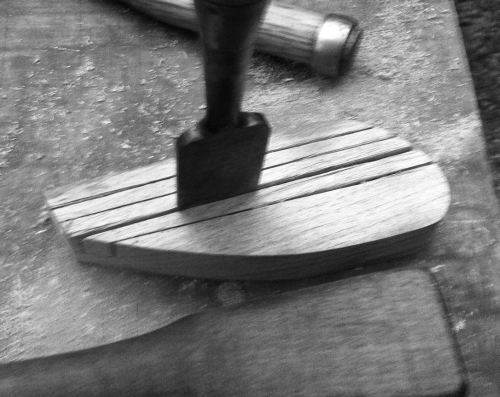
After getting the bottom reasonably flat, I used a router, the old fashioned kind.

Here it is with the bottom clean.
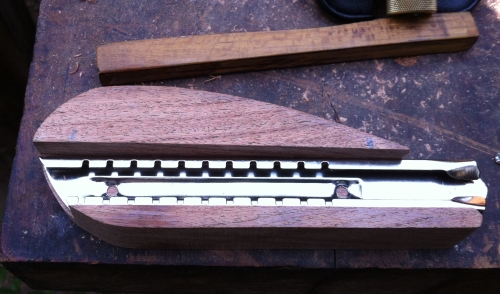
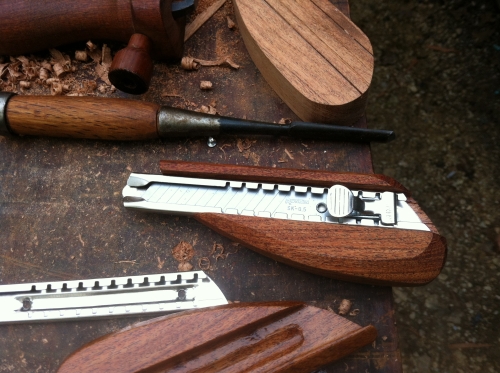
Now to fit the slide in. There is an extra indention in the center. Since I want the blade to be as stable as possible, I will need to cut out a gully for it.
Here I have marked the gully and the screw holes.
I am not going to use a chisel to mark the lines along the grain. Pushing a chisel into a thin section with the grain is a sure way to demonstrate how easily mesquite can be split. Instead I want rounded cuts. Here i have made the start of the end cut by rocking the chisel into the wood. Now I will cut outside that and remove a fingernail sliver to establish the end of the gully.
Th is curved cut is much less likely to split than a cut with corners would.

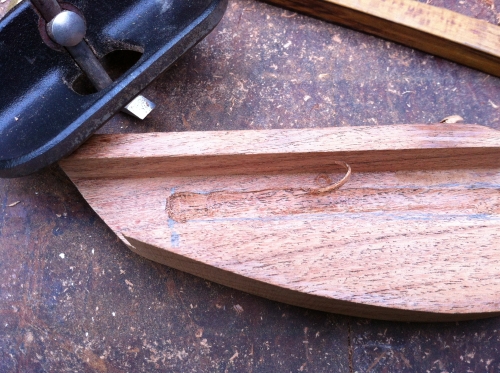
After using a gouge to cut the basic gully, I used the router to make sure I had an even floor deep enough to allow the metal channel to fit in snugly. I had to continue to clear the sides with a gouge as the router made small splintery tags on the sides of the gully.
To adjust the router to depth, I first tighten it down and then tap the bade post down on the highest section of wood. Then I press down to push the blade back up. this leaves the blade at a point where it will take a fine shaving. if by chance the shaving is too thick, I readjust. In the case of split prone wood, thin shavings are a must.
I am not going to bother with making the gully clean looking, the slide will cover it, and removing more wood than needed from a thin section of easily split wood is rarely wise.
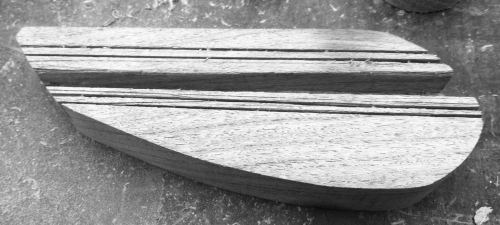
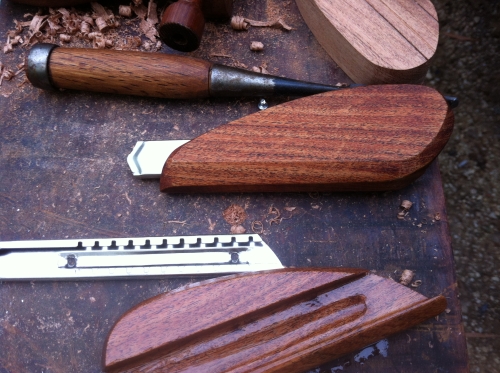
After getting the gully cut, shaping, smoothing and cleanup are in order. I went for rough 45 degree bevels. After using octagonal handles, I am becoming fond of the feel of them.

The back is pretty simple, but since this is the part that fits into most peoples palms, it needs to be smooth and feel good.
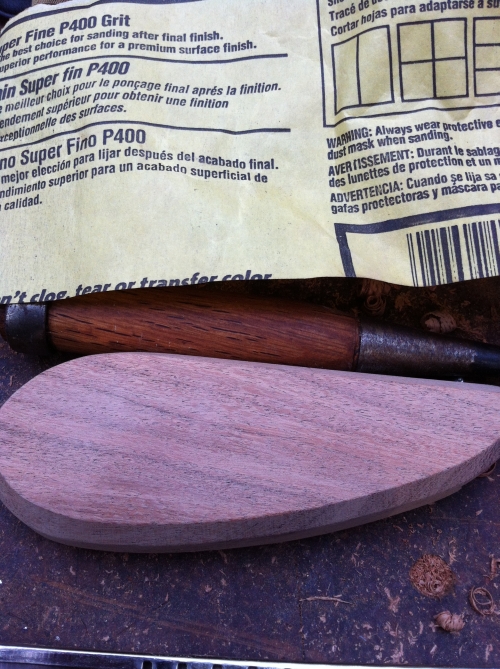
Then I soak it in a nice thick coating of high linoleic acid safflower oil.
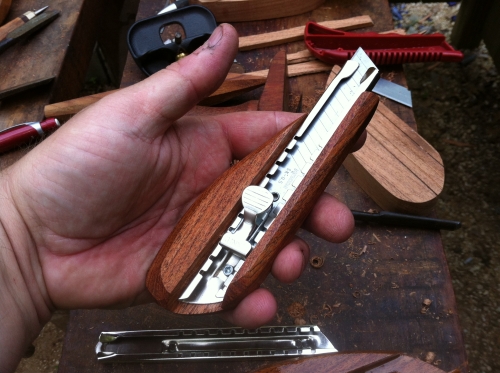
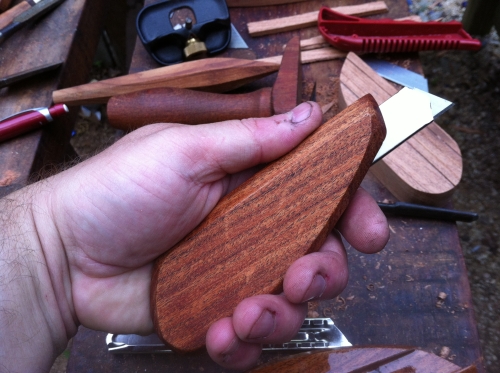
Here is the front view of a finished snap blade knife. After the oil soaks in, I treat it with wax.
The back view is simple but it shows the beauty of mesquite.
I am left handed, so here is what the knife looks like when I am using it.
While I tremble with the last details of working wood that is prone to splitting, I expect this finished mesquite handle to last me for as long as I can hold it. Odd stuff mesquite.
Bob
 A page Dedicated to My Writing
Hi, Bob!
Thanks for the article. I’m curious about what happened to the hex bit article – it doesn’t seem to be there any more. Will you republish it later?
I will publish that one later, there are some changes I need to make and a few article I want to post before I put that one up. 🙂
Bob
Where did you find the slide insert? I’ve been looking for one exactly like it (with the metal thumb lock lever) and I can’t find it anywhere. Any help would be appreciated.
I too looked for these for years. The package says cutter Jincheng KNIFE 18mm wide blade Automatic Lock. At one time I found them on the net at a Chinese import page. If you buy 15000 of them they are under a dollar. My supply of them sold out. You can get ones with a wheel lock that may possibly be better, but for my money, these are the best. All metal looks better with the wood too. For now, the only ones I know of that are available are on
Ebay.
Bob
Mercy Bob;
I don’t know how this one got by me the first time! While I’m still not doing more than shaping mesquite for handles, the cedar I’m working is splitting a lot and these are the answers to how to work around that. Thanks! I like the knife too!
Skip