|
|
Johnathan, recently posted on Woodnet his rendition of an inlay radius cutter. The design is one that Steve Latta showed in an article on Fine Woodworking. Lie-Nielsen sells one based on that design.
The tool is a very stable compass that can cut. My current need is one to mark a radius in steel. So I threw one together. It of course is a bit different.

The body is osage, the knob is mesquite, and the angle adjustable cutter/marker holder is ash.
The points where ground from old high speed steel drill bits and tempered hard. I need them hard because I am marking steel. In the picture below, you can see the radius cut into the edge of a head knife that I am making. The red just outside the cut is to show me where I need to grind off steel. I am using the thread end of a Chicago bolt to put the pivot in to give fine precision.

The arc on one side of the cutter tends to pull in as it cuts. This tends to reduce slop and make for a more precise cut.
The holder is tapered to fit into a tapered hole. The drilled hole in the end of the holder was drilled with the same bit that became the cutter. A pair of slices into the wood makes it grip the blade quite tightly when wedged into a tapered hole.
I even have a point for scribing instead of cutting. I will make another holder to wedge a pencil into the hole as well, when I need it later.

The hole was drilled, and then I used a sanding fid to taper it.

This is my sanding fid. A drill bit pushed to hard into wood so it locked in. Then the wood was turned to make a cone. A slit was cut in the end.

Now sand paper can be fed into the slit and wrapped around the cone.

Once it is wrapped, is is ready to sand out a nice taper.

The locking mechanism is simple, a threaded insert and a knob turned with a bit of brass thread and a nut epoxied into the end.

Opened up this can make a really big circle. Best of all, it is rock solid stable once set into position.

Bob
Here is my endless loop. I make stuff to make stuff to make stuff. Seriously. I have a theory that a leather tool box might be ideal. In any case I want to experiment. One thing that I need for this is a few leather tools. A lot I have bought, but one of the tools that I want can be fairly expensive for one as nice as I want to have.
I want a top notch, none better head knife. Sadly the economy is destroying my economy, so to afford a great tool, I will have to make it.
To start with, fortunately, I have a bit of Classic NOS Sheffield O1. Best stuff for holding a great edge, and stropping easily, so the next step is laying it out. I usually make a couple of tools at a time, in case I mess up. In this case, I decided to go ahead and make a few. Since I have scant leatherworking knowledge, I may make a few mistakes on the way.
Here is my initial layout.

Sadly the cuts were not going to work with the tools I have at hand for cutting. I had to make a less efficient layout that I could actually cut.

As this is nice tool steel, I tried to cut out to make good scraps for other tools.

After drilling and cutting, they are beginning to look more like head knives!

Now I need to be able to mark a center point of the blades arc and perfect the blade to that arc. This will enable me to rig a jig to sharpen it more easily later. This means, I need to be able to scribe a consistant line from a center point.
So I need to make a tool for that purpose. Fortunately the Texas heat has cooled down a bit this week.
Bob

Seriously, I love this tool rack system! It looks to be economical, flexible and functional. Plus the modular system allows you to rearrange things as you get more tools. The only real down side, is that tool storage systems that you can’t close are a bit more suseptible to dust and rust. If your shop is air conditioned and has good dust control, then this is not so important. For me it is a bit of an issue. Not that my current methods are any better. 🙂
David Pickard, the designer sent me an email offering router bits for linking to his site’s, http://www.woodshopics.com/ and http://www.woodshopbits.com/ (carbide router bits).
Here is the thing though, I like David’s work, but I don’t like tailed, screaming, wood manglers. (Routers) I own three of the damned things, and I have fortunately been able to avoid using any of them for the last two years.
I am not a purist, I love my cordless drill and my bandsaw, but I prefer to be bathed in quite peace, without hearing protection, goggles or risk of motor based finger mangling. If you do use routers, by all means check out David’s goods, in any case, be sure to check out his storage system. He is definitely a clever designer!
Don’t think for a moment that this is a show of integrity and resistance to selling out, if Clark & Williams, Lee Valley, Bridge City, or Lie-Nielsen made me an offer, I would sell out in a moment!
Bob
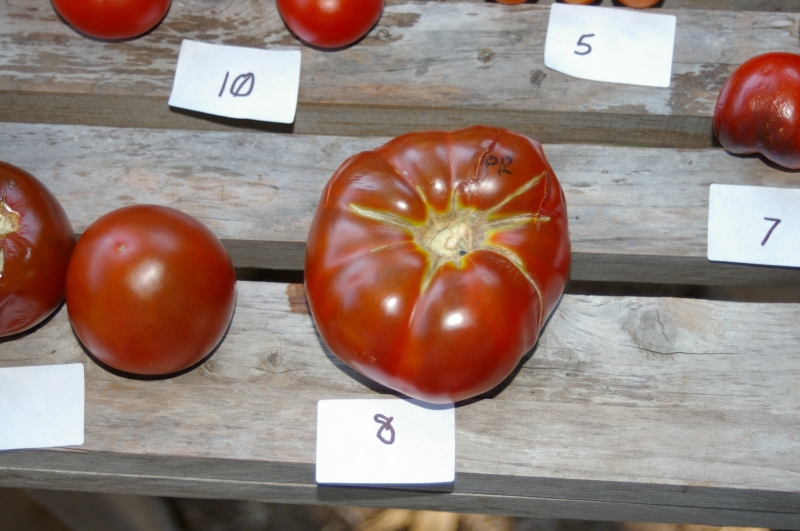
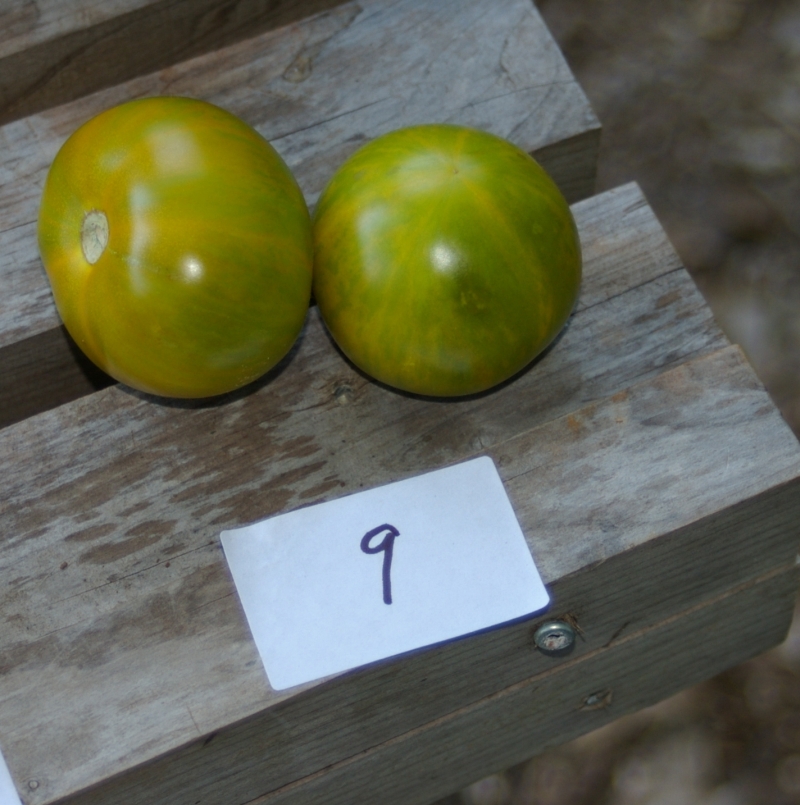
Here are the tomato varieties that I will be trying from seed gathered at the Tomato Festival!
#1 Tipsy and #2 Green Giant x Yellow Submarine F1

#3 Dice’s Mystery Black

#4 Jaune Flamme a wonderful French heirloom tomato

#5 Sungold

#6 Purple Haze F1

#7 OSU Blue
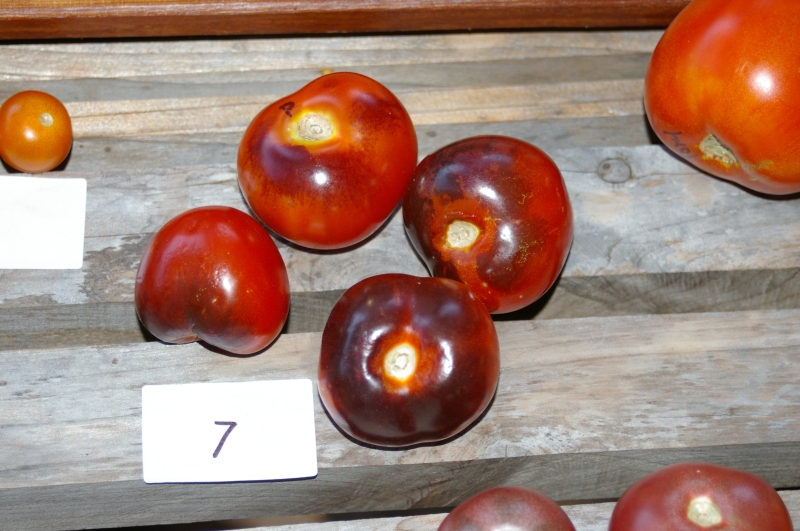
#8 Paul Robeson
#9 Tennessee Green
#10 Morovsky Div

#11 Golden Gem

#12 Redfield Beauty

#13 Tony’s Italian on the left and #14 Momotoro on the right

#15 Black Cherry

Bob
When I started out exploring and sharing experiences on woodworking using the web, I took the handle ‘Cedar Slayer.’ Between allergies and my enjoying the smell of the wood, I was cutting and using a reasonable quantity of the stuff. I grew to love this wood, and was surprised at the variability of it. As I researched and read up on the stuff, I found out how to cure cedar fever, and how valuable a tree cedar is. Mind you, I don’t want it everywhere, but am actually encouraging the plant to grow in a few places in my yard now. I found out that a lot of cedar we use is not even cedar. If it holds up in weather ok and smells cedary, we call it cedar. The ‘cedar’ used in cigar boxes is actually a hard wood. The cedar in my yard is juniper.
Lovely stuff juniper. in the middle of summer it grows pretty powder blue berries. In late fall, in my yard, the berries ripen. Most fall before you can pick them, but the ripe ones are actually quite sweet and tasty. if they are not ripe the taste pretty much like pine smells. The story is that if you eat five or so berries, you will be immune to cedar fever allergies. My family tried it this last year, and for us, it worked.
Here is a site with a lot of good information on cedar.
My current plan is to put a windbreak of cedar at the north end of my yard. The more I work with and learn about cedar, the more I love it. The trees can be real itchy though, and I am not fond of itchy.
Bob
|
|
 A page Dedicated to My Writing
Recent Comments