I finally have the table set up for the Jointmaker Pro. So now comes the testing.
I decided to use a shaft of very tight grained ash. A vicious test for any saw. I am not going to go easy on the JMP.
First I took a section of ash, 1.3″ by 0.95″ I set up a stop to give me a six inch length and then cut several matching blocks.
Here is the process, the blade is raised by a hand crank. The crank needs to be turned 17 full rotations to finish cutting through the blank. By adjusting the angle of the blade, the depth of the cut can be altered. by matching the amount that you turn the crank, to the depth of the blade, you can make sure the entire length of the blade is used during a push. I found that the most aggressive cutting I could do with a reasonable margin before chatter was 1 and 1/2 turns at a time. So once I got it down, it took about 12 passes of the blade to cut through.
The cut is mirror smooth. You are not going to improve the surface with any method I know. This is polished end grain. Simply put, for a cross cut, this tool passes with flying colors. It is not the fastest, but the precision is outrageous.
Now for the hard test. I like octagonal tool handles, and I figured that this might be the tool of choice for this task.
The chunk of ash was cross cut, by the JMP into several identical lengths. The blocks are 1.3″ wide.
So first I cut the block to a square. I did this by clamping in two blocks to prevent racking. I used another block endwise to set the spacing to make a perfect square, This was easy enough. Then I started cutting. A 1/4 rotation of the handle was as much as the blade was going to handle while cutting a 6″ long slice. This means 68 passes to cut. The rip blade was more stable on the cuts, so I didn’t have to worry as much about slopping over the 1/4 rotation as much. this made it well worth swapping out the blade. The rotation and the pitch of the blade are tied to each other, if you want to be efficient you want to use the entire blade. First you adjust the pitch to find a cut rate that is stable, and then you adjust the amount you turn the crank, to match the cut rate.
Having to make 68 passes to cut a clean finish line through an ash board 6″ by 1″ is not unreasonable for hand sawing, but it does not make you rejoice with the efficiency of the system.

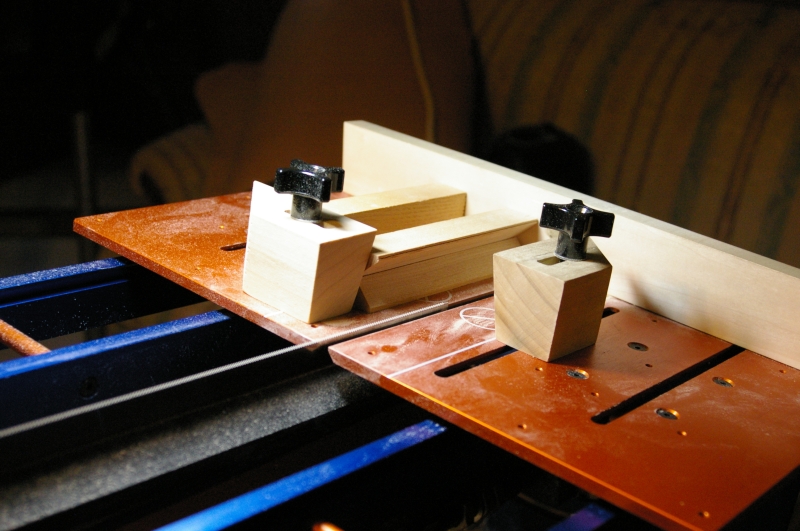
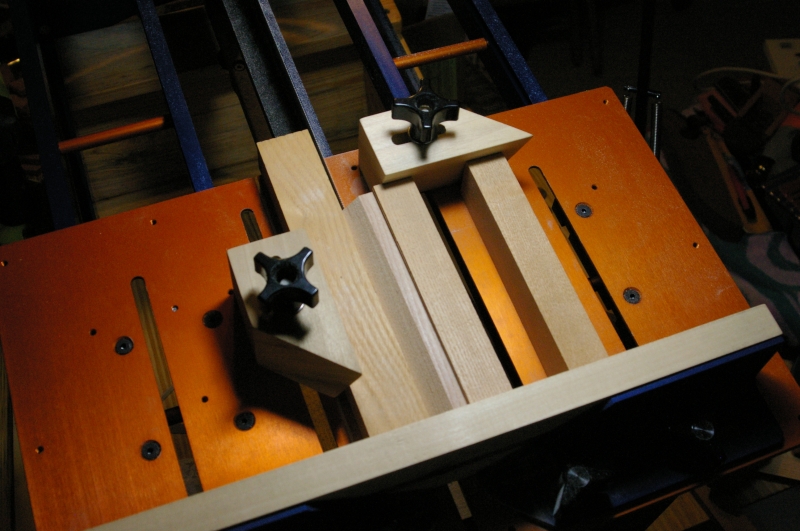
The first Jig I made is simply a V-Cut in a block of ash. This lets me center another block at an angle. I used the angle scale on the saw to make the adjustments, and they were quite well dead on. It is rare for a machine to have angles that you can trust, but this unit seems to be perfect. On the other hand a whole new issue surfaced. I am not sure of the physics and why this is, but at a 45 degree angle, the saw blade was stable as long as 1/8th of a turn was made per pass. This means that the V-Cut took a total of 244 passes to cut. The only flaws in the V are due to my mistakes, the fit and finish is perfect, I cut one side 2 passes too deep. The V that was cut out, fits in perfectly, The square block fits it perfectly as well. We are talking machine shop fit in wood.
One note on angle cuts. The blade is a bit flexible and can bend. The first few passes, before an angle is established in the wood to guide the rest of the cut, should be very, very shallow. Other wise the blade may glide along the surface and leave a poor finish on the side that you did not plan to cut.
Here is the final jig setup. The block on the left of the blade is to hold the block being cut in place. The block is in the V-Cut jig, having the last of the four corners cut to make an octagonal blank.

Again it cut perfect surfaces. In this case however, I found that I needed slow the cut down to 1/12 of a turn. Like hours on a clock, I would make a pass and then move the crank one more hour forward. Fortunately cutting the corners off is only about half as much as cutting a side, so it was not intolerable.
The final result, a nicely cut octagonal blank, and my back was beginning to complain. I have a few back issues, and this woke them up. I need to take more breaks while working with this tool.
Here are a few more pictures of the process.
You can click on the images for a bit better detail.
This is not the method I will use in the future for making octagonal blanks. It does a good job, but with a vise and a plane, I can do it much faster. For end grain cuts in small sections of wood, this tool has no equal. For thicker rip cuts in dense wood, it gives options, but is really not the right tool for the job.
Bob

 A page Dedicated to My Writing
Recent Comments