|
|
I am trying to explore styles of art. So far, I have drawn a cartoon.
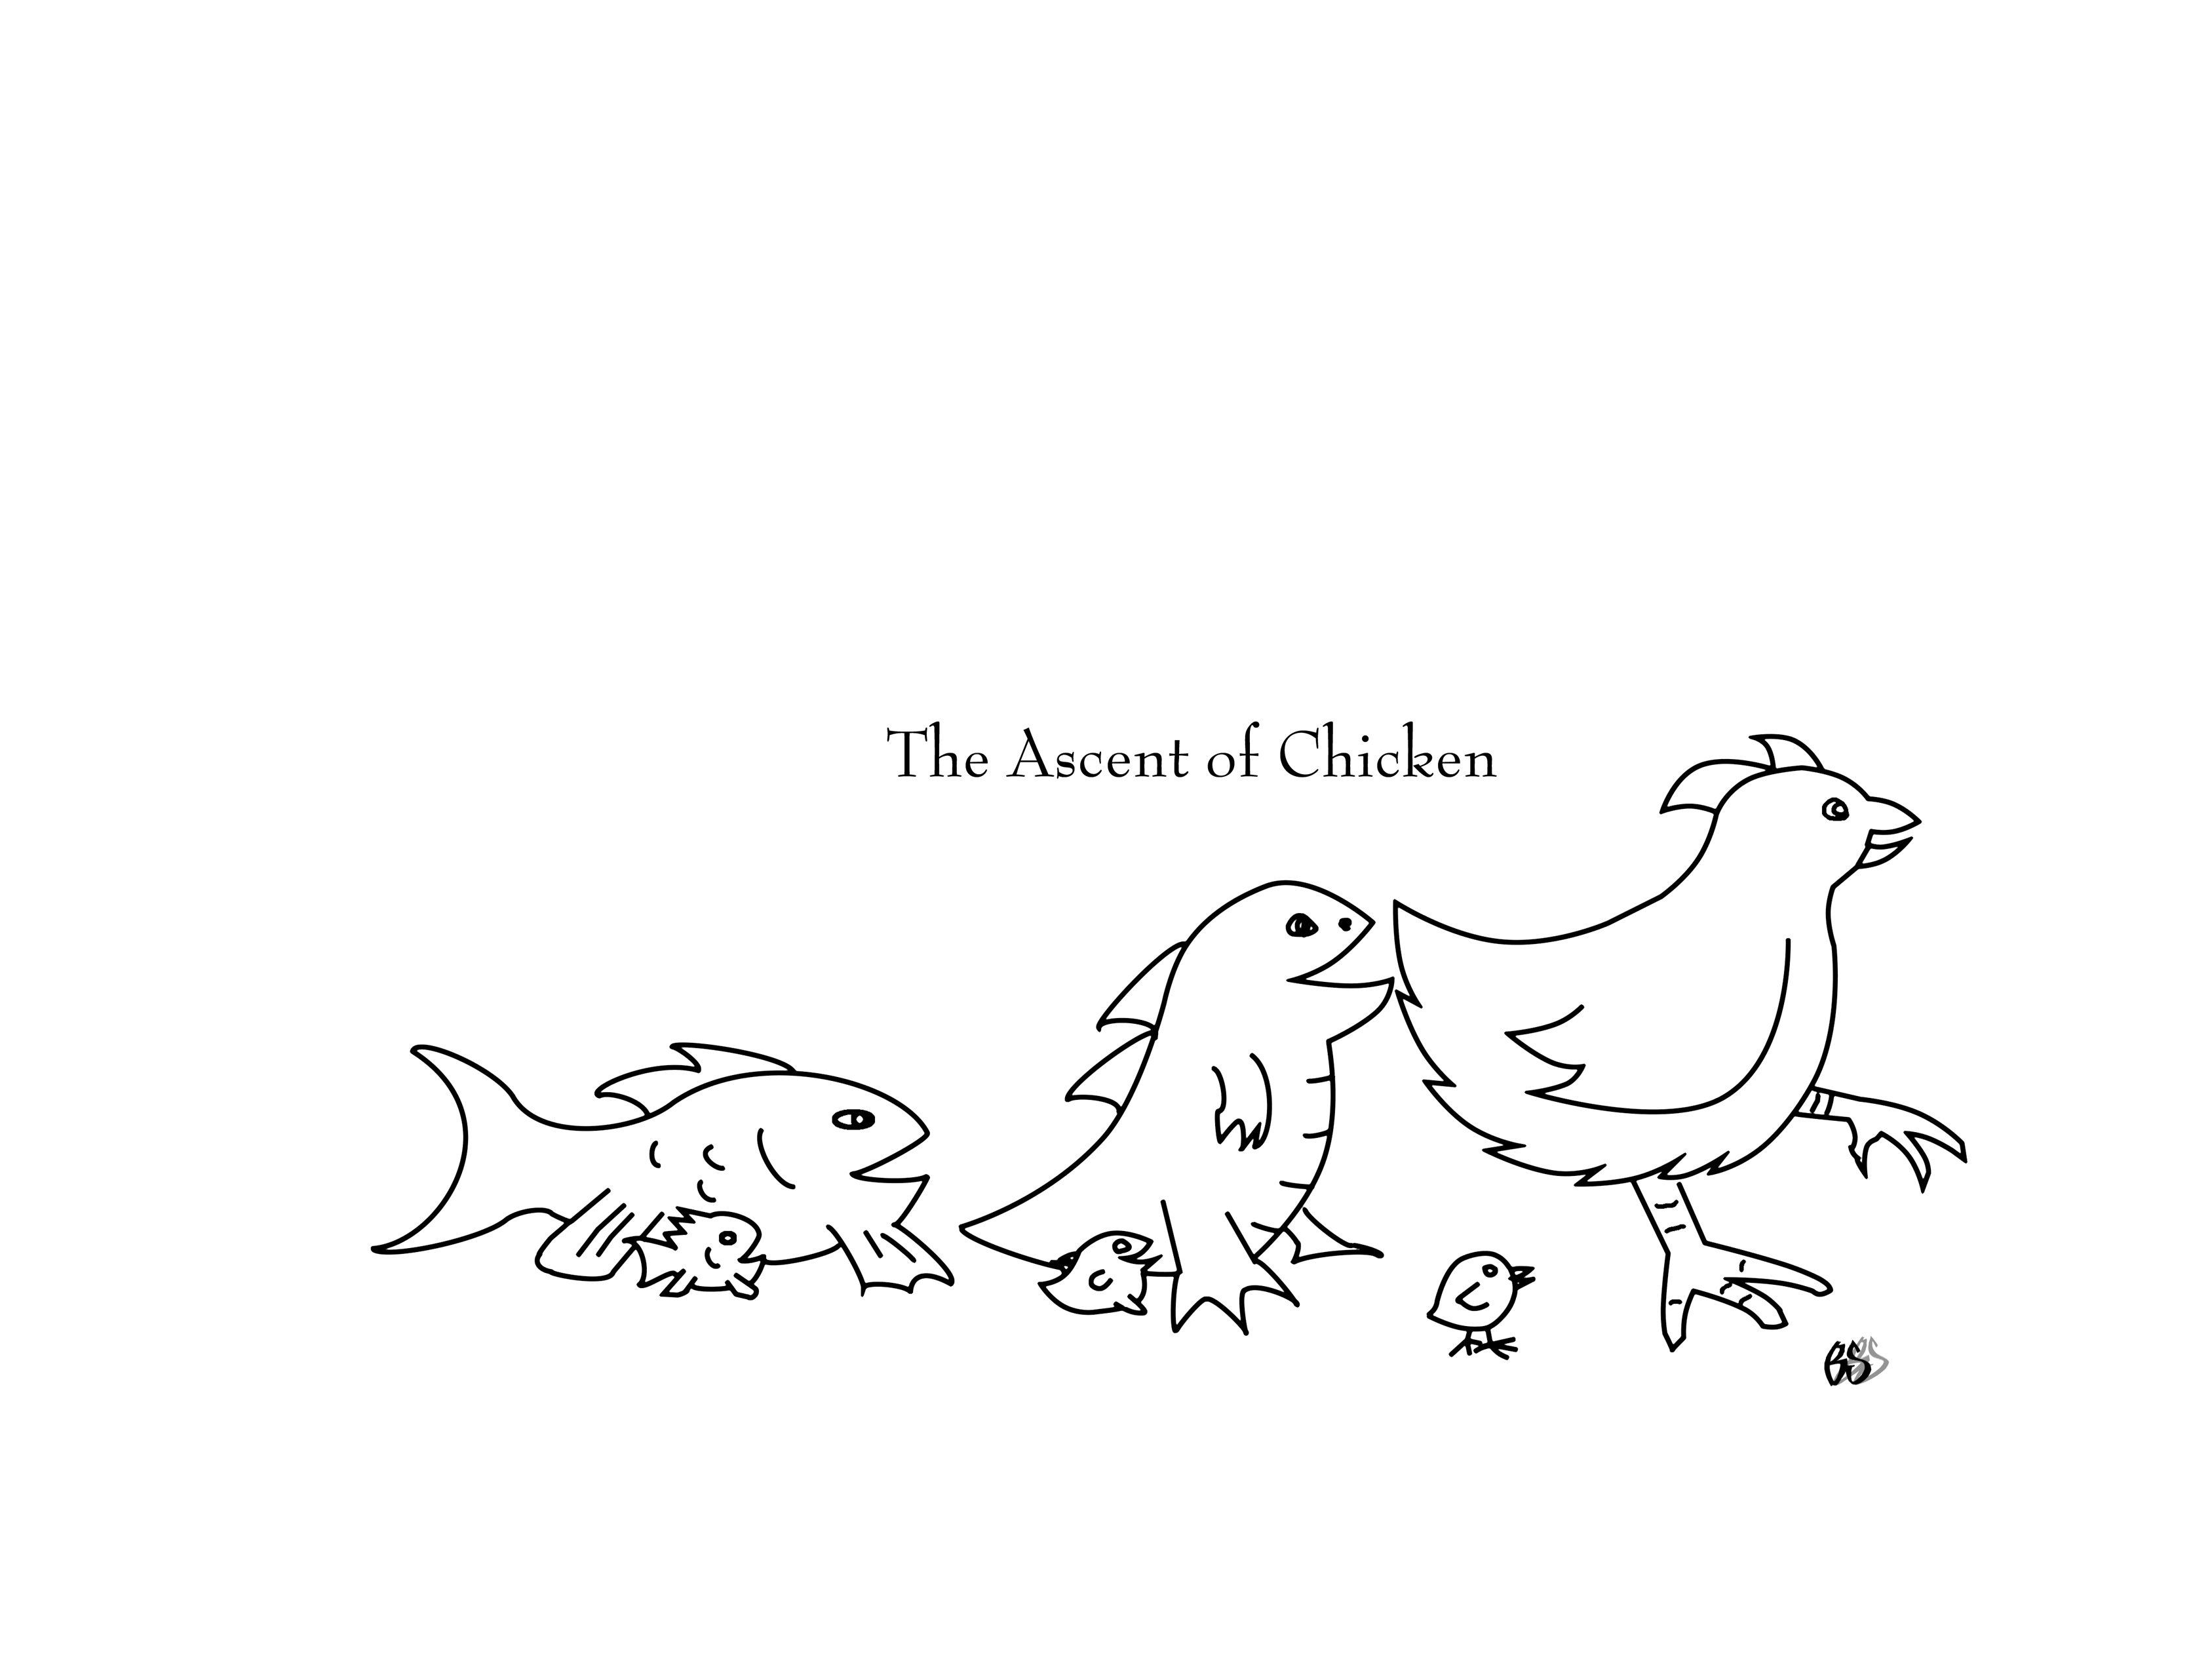
You can click on it for a larger view. Skip and I have been discussing art for quite a while, these discussions have really drawn my attention to the importance of expression. I think our tools have quite a bit of influence on our work. Apart from their function, they are examples of form that we hold and use. We place them in cabinets where we can view them as we work. Their curves, embellishments and miters influence and inspire our decisions on form.
Bob
The Gritty Details
Here is a table of the relative grit sizes of the different standards used. CAMI is the American Standard, and for a long time is was the main standard. The European standard, FEPA, is more precise, and so FEPA graded sandpaper tends to work faster than CAMI. JIS is used for Japanese water stones, and Mesh is a measure based on the screen used to sort grit. An inch is 25400 microns across so a micron is pretty small. A pair of lines a half micron apart is right at the limit of what can be seen by an optical microscope.
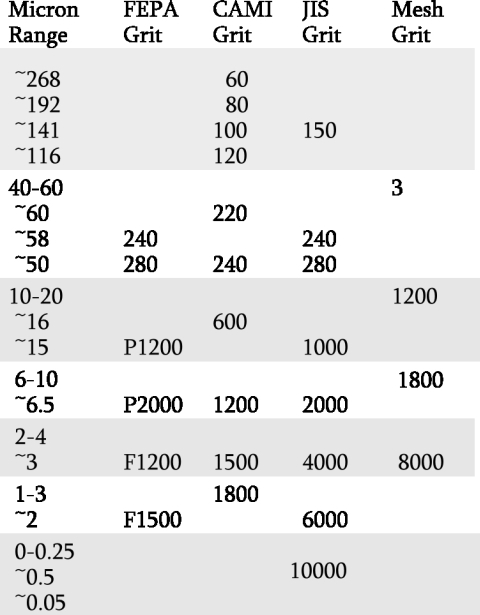
I personally like to use microns for most calulation and estimates. Microns are a consistent scale and when things are measured in microns, they are usually much more precise. I also like to use grit graded with a range. Without a range of size, the grades listed can be pretty far from precise and have a wide range of grits mixed together. Using mixed grit sizes slows down your work. If you want to sharpen quickly mixed grits are usually something to avoid.
Usually when sharpening, you are best off, just touching up the blade with the finest grit surface you have available. Only when initially sharpening, removing nicks from blades, or correcting dubbed edges, do you need to go through a range of grits.

To grind down a surface using an abrasive, the best, fastest method is to start out with the largest grit that cuts a line that is not as deep as the amount of material you wan to remove. You then grind down to nearly the depth you want and then switch to a grit size that is half as big as the size you just used. You keep reducing half the size until you reach your final goal.
The reason why you want to switch grit sizes, is that it can speed up your work considerably. Here are six blocks in order, each is half the size of the last one.
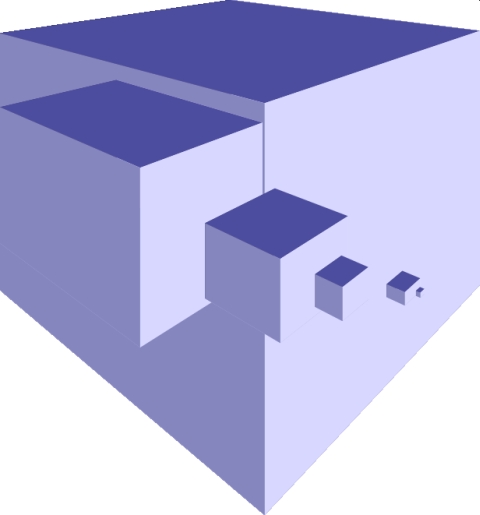
The big one is roughly 32 times as tall as the smallest one. If I need to grind with ten passes at a particular grit, to get the surface ground to it’s maximum fineness with that grit, then I would have to do a total of 60 passes to work through the grits and reach the final size. If however I start with the smallest grit I will have to make 360 passes. Using multiple grits is faster. There are more reasons than just speed to use multiple grits. As an example I will assume we are using sandpaper. if my abrasive sheets are good for 20 passes, then I can either half use six sheets, or use up eighteen sheets. Time and economics matter. If you only learn one thing from these discussions, this is not a bad one to learn. In this example you will be able to work six times as fast. In real life, large grits are faster by more than just scale, so in real life, you will be faster still.
Another thing that can speed you up considerably is to not go too far with each level of sharpening. A lot of sources will tell you to grind one way with an abrasive, and then grind a different way with another abrasive until the first ones marks are all gone.
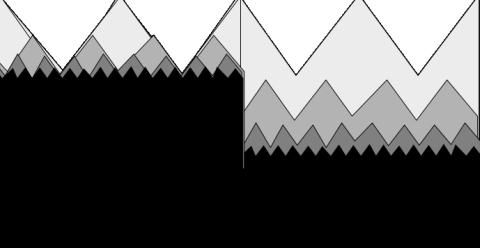
In the illustration above, the right hand side is a cross section of what you get when you grind the previous grits scratch entirely away. On the right hand side is what happens when you grind down to the same level, or just a hair lower with each grit. You end up grinding half as much from the blade. This makes the job twice as fast and uses half the materials and lets your blade last twice as many years before it is ground too far down to use.
There are a lot of different methods of sharpening. Most of them can produce a sharp edge. A lot of folk have switched sharpening methods, thinking that they can get a sharper edge by changing systems. Maybe they can, but most experts on sharpening can sharpen pretty well on a sidewalk slab. Some of them can then finish up to an edge you can shave with, with the top of their boot. I am not making a wild claim here. My aim is for you to be able to easily become one of those experts. Using these primitive methods is far from ideal or as fast, but it can be done.
An ideal cross section of most sharpening systems, be it sandpaper, oil stone, whetstone, or grindstone, might look something like this.
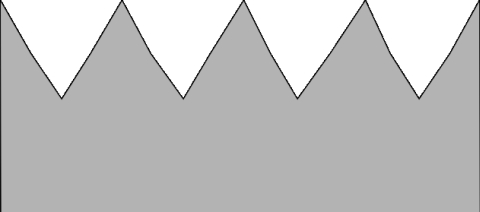
The tips will fracture soon enough.

While the stone is usually much harder than the steel, pressure and wear will quickly make the surface more like this.

A lot of abrasives will fracture into sharp shards that will still grind off metal. This will be slower, but with the flattening of the teeth, and the fine grit produced, the abrasive left will leave a much finer finish. So you can, if you want to, keep on sharpening forever, while your stone gets more worn down, clogged up, glazed, loaded, and finer grained. High pressure on the stone will cause this to happen sooner. A stone that is clogged up, will still sharpen, but it is very slow to do it. They make tools for cleaning up these surfaces, big gum rubber erasers for sand paper, diamond points or spinning steel stars for grind stones, resurfacing stones and blocks for oil and whetstones. Top quality stones often will wear down on their own, exposing new surfaces. A gentle touch on these stones is a requirement for best results.
Another method is to use loose grit on a flat steel surface.
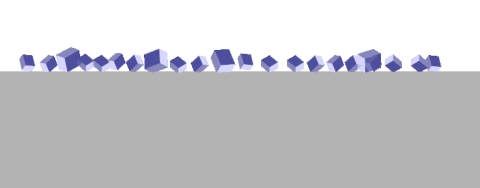
Loose grit gives you all of the advantages of the finest stones, with a much lower cost. It gives you the loose grit surface that a fine whetstone will produce. This allows the grit to roll and use all edges. One of the methods that is considered an inexpensive way to get great results is the Scarysharp method. It consists of using sandpaper on glass or stone plates. In the short run, it is quite inexpensive, but it ends up being pretty comparable in cost to stones and sharpening machines as you keep replacing sandpaper.
Loose grit is much less expensive. They use it to make sandpaper. After preparing paper, and glue to bond the grit, and packaging it, the cost of sandpaper is going to be higher than loose grit. With sandpaper you only get to use one tip of the grit to sharpen with. When it dulls, you don’t get the fine pointed polishing action of loose grit, except to a very minor degree.
In my own experience, loose grit is not as fast as the first few strokes made with good quality sandpaper. Norton 3x sandpaper will, for a while, beat loose grit of the same grade. A good stone freshly surfaced, will perhaps also beat loose grit for a short while. Then the difference becomes apparent. The loose grit keeps on grinding and fracturing and polishing. There is a reason experts use loose grit on a slab to flatten the bottoms of planes and other tool surfaces, and polish the faces of stones. It is a faster, more precise, and less expensive method.
In the seventh installment, I will detail an even faster and less expensive variation on this method, using thousands of diamonds to sharpen.
Bob
Sharpening Tools, Part 1, Part2, Part 3, Part 4, Part 5, Next part is Part 4
My method of sharpening is to make two extremely flat surfaces that intersect. This intersection is the edge.
To make a flat surface flat the first time, I grind it on a flat surface with an abraisve powder. The flat surface I use is a slab of annealed O1 tool steel. The Japanese would call this a kanaban. The abrasive powder I use is 220 or so aluminum oxide grit, that I get from a lapidary supply.
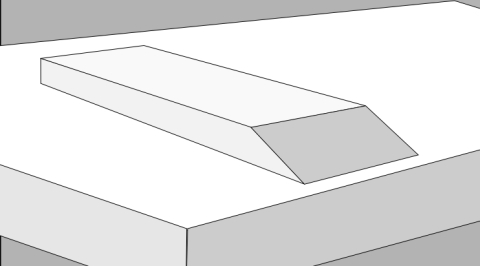
I rub the back side of the tool around on the grit with a touch of olive oil, baby oil camelia oil or ballistol for a lubricant. The grit breaks down into finer sharp bits, and eventually becomes a fine paste. I may have to add more grit to keep the mix course, but as the process continues it eventually turns to a fine paste, and the blade will vaccuum stick to the plate. At this point I clean it an inspect the surface. Usually it is now quite flat. I may put a finer abraisive on the plate and polish the back of the blade.
Then I do the same thing with the bevel of the blade.
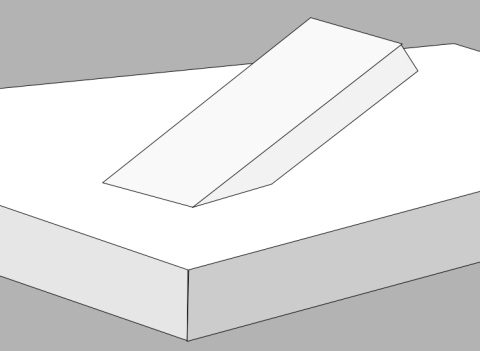
When I have finished this process, often the result is a fairly sharp edge. Often this edge might do, but more often, despite it being sharp, it has a huge flaw. This flaw is called a feather edge.
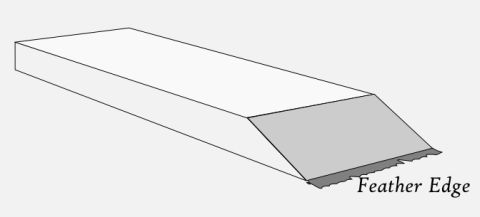
Feather edge management is the key to being able to sharpen a blade really well. If you ignore it, the feather edge will snap off in use, and will reduce the sharpness of a blade considerably. You don’t really want to bend it off either. You want to gently, softly grind it alternating on the flat and bevel side, until is separates, leaving behind an ultra sharp blade. A typical pattern would be to grind the flat for eight gentle strokes, followed by grinding the bevel for eight gentle strokes. Then alternate between flat and bevel for four strokes, then two strokes followed by one stroke. It is easy enough to do the flat of the blade perfectly, but the bevel can be a bit more touchy. If you grind forward and back, it is easy to rocker the blade a bit. Eventually you will get a blade less flat than convex.
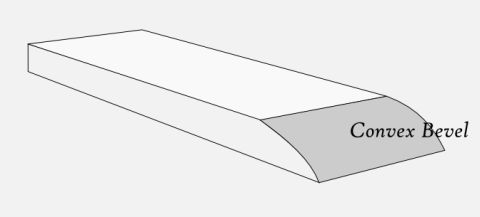
A convex bevel is generally something to be avoided.
If however you grind the bevel, from side to side, you will eventually get a rounded edge.
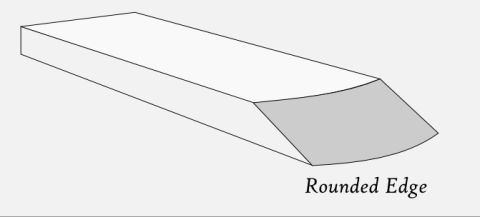
Since on most tools, the bevel is wider side to side than it is heel to toe, this rounding will take longer and will first result in slightly rounded sides of the bevel on the tool. In a lot of cases, especially on smoothing plane blades, a slight rounding of the bevel side is advantageous.
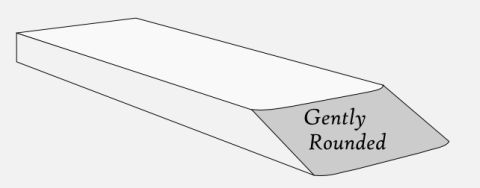
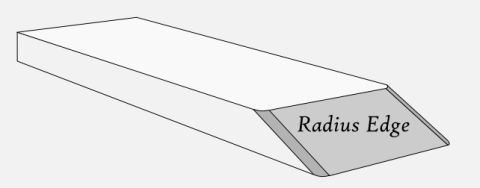
Often when conditioning a plane, a radius is put on the sides of a bevel, especially a finishing blade.
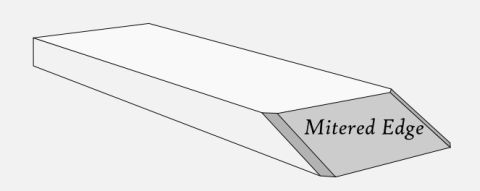
Some folk put a miter on the sides of the bevel.
In the next installment, I will get into the gritty details of how to sharpen.
Bob
Sharpening Tools, Part 1, Part2, Part 3, Part 4, Part 5, Next part is Part 3
Sharpening is the key issue for using hand tools for wood work. If you cannot sharpen, then hand tools will not perform for you. Sharpening is a simple task. It is pretty easy to get an extraordinarily sharp blade. It does not take long to sharpen a tool, and it does not require years of apprenticeship to learn how to do it.
It may take a bit of unlearning however. There are a few thing that TV and movies may have taught you wrong. Kind of like holding a gun sideways to shoot like a gangsta, is stupid in real life. So there is some movie physics, that needs to be unlearned if you are going to be able to sharpen well.
If you push down hard when putting a fine edge on a blade, you will deform the thin edge, and not get a sharp blade. Dramatic stropping, sharpening and grinding only works on the screen. In real life, pressure on the edge will flex it. This can and will prevent a blade from having a precise angle or a keen edge. Too much pressure, eats up the grit you sharpen with quickly, as well,
When sharpening it is important to have a clear idea of the sort of blade and edge you are trying to produce. This can be a bit complex as there are critical trade offs in every configuration and woodworkers wiser and more experienced than I can get into heated debates over those trade offs. I drew a few images to make things more clear.
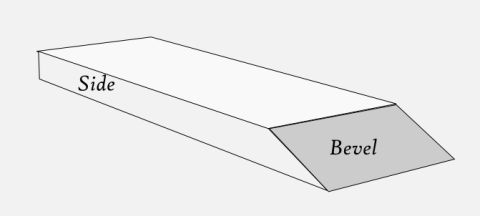
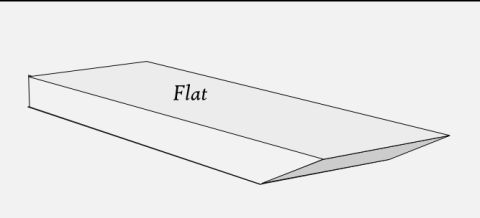
A keen blade is one where the flat and the bevel intersect without distortion or curve.
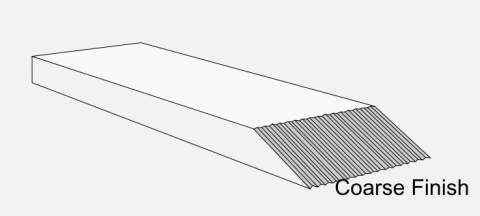
A coarse finish is not as strong as the jagged extensions on the end of the blade can break more easily. They are not supported as well. This is not considered to be keen.
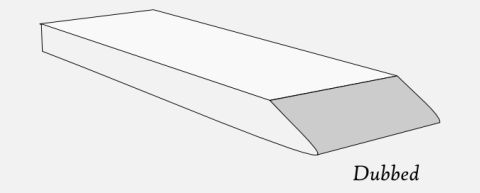
A dubbed edge will not cut as well, it is not as keen, and since the angle bends, it is not as sharp due to keen and angle. Dubbed edges are strong, but since they take more force to do less work, they wear just as much if not more than a sharp edge.
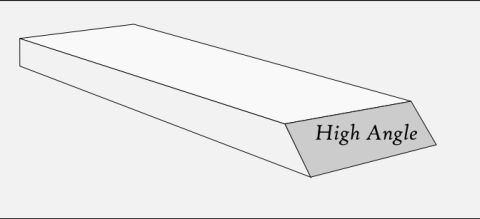
A high angle blade is not as sharp, but it still should be keen. A high angle blade is stronger and more rigid. A high angle blade will not tend to deflect so for some applications a high angle blade is quite valuable.
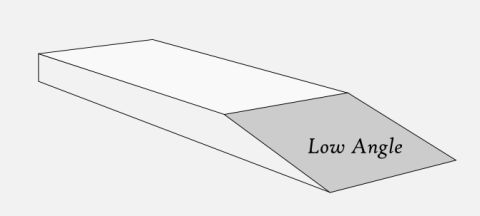
A low angle blade is sharper. It is not as strong and it can dull faster. It will cut with less effort and in many cases will cut more smoothly. If you scrape with a low angle blade, you will damage the edge quickly.
Concave bevels can be quite useful.
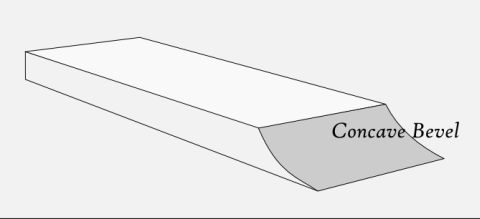
Concave bevels are usually made on a grinding wheel. They are easy and quick to sharpen, and have a great clearance angle for work. They can do a very good job cutting. They are often weaker and will deflect more that a flatter bevel will.

Convex bevels are very strong and very durable. They are not as keen. They are usually made by poor sharpening proceedure, or lots and lots of honeing freehand. Generally convex bevels are something to correct.
In any case the bevel heel and the majority of the bevel should be flat or or concave.
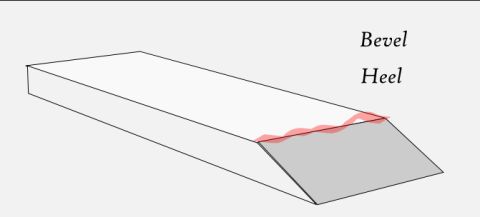
I personally prefer for the bevel on a blade to be entirely flat and the flat of the blade to be entirely flat. There are however a lot of very fine craftsmen and wood workers who like to make the Bevel toe, a bit convex by putting a micro bevel at the toe.

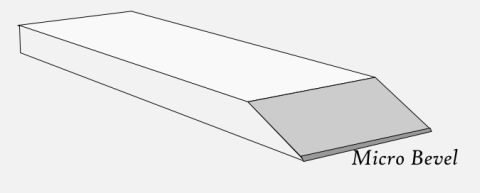
Some will put a micro bevel on the flat side of the blade. Some will micro bevel both the bevel and the flat.

Micro bevels are stronger and more durable. If managed well, they can extend the life of a blade through multiple sharpenings. They can also speed up sharpening. Micro bevels are a very effective way of dealing with feather edges, a result of sharpening, on blades. Most safety razors are microbeveled, twice. On the down side, few people will take time to keep track of their micro bevels. Without good managment, microbevels tend to shorten the life of a blade. Micro bevels increase blade angle, so the cutting edge sharpness is reduced. Micro bevels are less strong than a blade that is entirely flat at the same angle as the micro bevels final edge.
In the last installment of this series on sharpening I plan to discuss how to quickly and reliably produce a good micro bevel, but the main thrust of this series will be how to make the flat, and the bevel, flat planes that intersect at a keen edge.
Bob
Sharpening Tools, Part 1, Part2, Part 3, Part 4, Part 5, Next part is Part2
At one time I posted an article about Chicken Feeders. These feeders have worked out fairly well, but the measurements were not ideal. Feed was scattered, and the water on some of them did not flow as deeply as could be desired. So here are the updated dimensions, that for adult chickens, small and large, work perfectly.
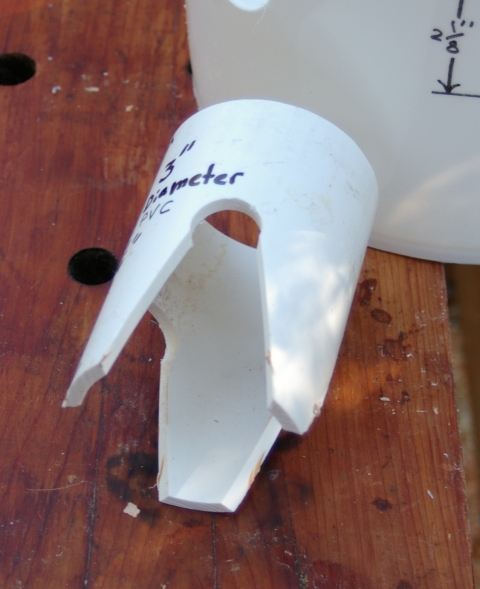
For the support ring, I like a 3″ PVC pipe section. The bottom of the feet should be from 1/2 an inch to 1″ wide.
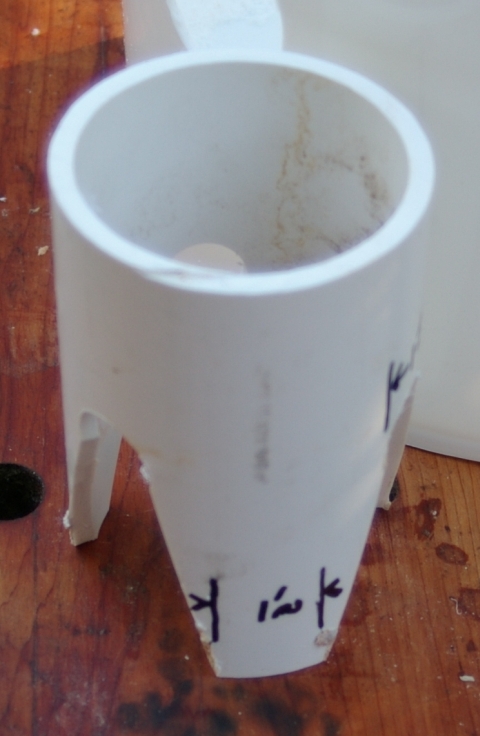
The top notch should be about half way up. I like a 1″ hole to start.

The critical measurement is the height, 5 1/4″

Here is a bottom view of the finished support ring.
The bucket holes should be high enough to prevent grain spillage. My holes here are 2 1/8″ in diameter, and centered 5″ above the base.

This way the water and the feed fittings are the same and work out perfectly. This feeder reduces the mess made of the food and water, by the chickens, it mostly eliminates the waste of food, and it is quite reliable.
Bob
|
|


 A page Dedicated to My Writing
Recent Comments