Mesquite Square, Part 6

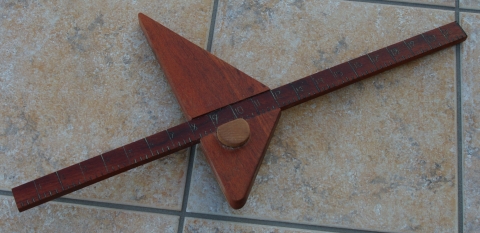
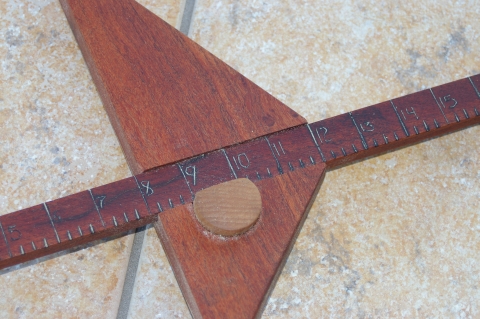
The beam of the square I have been making has been a bit long to fit in the tool box I have planned for it.  I also wanted to try my hand at some wood burning.

I intended the numbers to get larger until 12 and then start smaller again.  It did not turn out as professional as I had planned, but I am not too disappointed.

Bob

Making a Hexagonal Tool Box, Part 2, Templates and Guides

If you read my previous post, then my template may be familiar.

A good method is to use the template to set up the stops on your measuring equipment.

The stops in this case are a pair of brass stair gauges attached to a large carpenters square.  These two gauges once set to give a specific angle, will allow you to instantly reproduce the same angle over and over.

In the example below, I have the rule pulled a bit back from the edge of the template, but by laying down the template, and putting the rule right on the edge of the template, you can mark precise lines on the edge of a paper template.

These methods will help you to produce fairly accurate work.  Much more accurate than using degrees and angles will tend to get you.  By starting out precise, your job fitting stuff together nicely becomes much easier.  Don’t get too hung up on precision however nice it is.  Wood changes shape, precision is hard to maintain.

Bob

Making a Hexagonal Tool Box, Part 1, Hexagons

First thing you need is a really precise hexagon template.  Enough other errors will creep into your work, you need to start with a good pattern.

Fortunately this is fairly easy to do manage, and you don’t need a lot of expensive stuff.  A compass and some paper will do quite nicely.

Here is what you need to know to make a lot of precise shapes.

This pattern can be made easily and precisely with a compass.  With it you can draw a hexagon, an equalateral triangle and a 30 degree /60 degree diamond.   With the hexagon, it is easy to create a perfect ‘Star of David’ and a few other nice forms as well.

Here is how you do it.

You draw a circle and then draw another circle the same size, with the center of the second one on the first circle.

Then you add another, with it’s center placed on one of the intersections of the two previous circles.

Nice pattern all by itself.  You can make a nice triangle just by marking lines from the outer intersections to each other.

Then you add another circle in the same manner.

And after adding two more to go all the way around the first circle, you get this.

This takes us back to the first image, and shows us how to make a precise hexagon.

Bob
Mesquite Square, Part 5

The scratch shave is nice, but for me it is rarely used.  The item that I use all the time, is a marking gauge.   When you need a precise line marked parallel with the side of a board, this is the tool to use.

The working part is the point that sticks up at the other end.

Here are the components;

The hole in the beam has a taper on it.  The small ash dowel also has a taper.  It is drilled large, most of the way through the center.  Then a fine hole completes it.  Four slits are cut part way throung on the point, so that when the awl is pushed through the hole, the four sections expand a bit.  Then when the tapered dowel is pushed through the hole, it further compresses and holds the awl quite snugly.

Bob

Mesquite Square, Part 4

One nifty tool that can be easily added is the scratch shave.

ha

This is made by making a notch, drilling a hole and threading in a brass bolt and knob.

The blades for it are from Lee Valley,  Andy was kind enough to give me the location.  They can be shaped from a bit of metal, with a file.

This is a fairly easy tool to use once you get used to it.  Be sure to practice on some scrap first, you can mangle wood badly the first time.

Bob